LEGO Hamster Maze: Turning Bricks into a Tiny Adventure Park
Share
How to build safe, modular obstacle mazes inspired by a viral hamster run
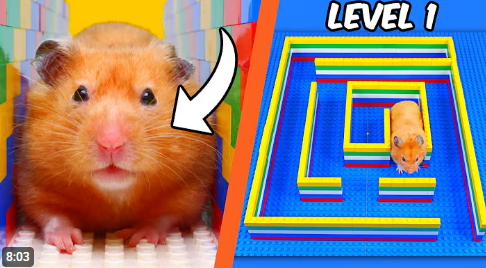
Inspired by a recent YouTube build where a tiny hamster explores several massive LEGO mazes packed with obstacles and challenges, I set out to break down how you can design your own safe, smart, and endlessly reconfigurable maze system at home. The core idea is deceptively simple: use modular baseplates as “rooms,” connect them with interchangeable corridors, and sprinkle in gentle, non-stressful obstacles that encourage exploration. As the video shows, the magic comes from variety—ramps, doors, moving bits, and visual cues keep small pets curious and engaged while you supervise.
What makes a great hamster maze? It’s not just walls and turns; it’s thoughtful, pet-first design. Start with safety: smooth surfaces, no gaps where tiny toes can catch, and zero adhesives or rubber bands that could be chewed off. Build on sturdy baseplates (16×16 or 32×32) so modules lock tightly and you can rearrange the layout in seconds. Keep corridors wide—6–8 studs is a useful guideline depending on species—and favor tiles for floors to avoid exposed studs that can snag nails. Transparent panels (or low walls) help you keep line-of-sight while reducing the urge to pick the hamster up mid-run.
Next, consider flow. A maze that’s too linear feels like a hallway; too random becomes a dead-end party. Borrow from level design in video games: introduce a short “tutorial” section (a gentle ramp or a simple doorway) before presenting a slightly trickier choice (forked path with a visual cue), then reward progress (a cozy, open chamber with a hideout and a treat). Keep verticality limited and safe—low, shallow ramps with traction (tiles + grille/plate texture) are better than steep climbs. If you include bridges, add guard rails at least 2 bricks high and soft landings beneath.
To maintain attention without stress, think micro-challenges rather than “stunts.” Good obstacles are slow and predictable: a teeter ramp that tilts as weight shifts, a swing gate that opens with a nudge, a slider wall you can reposition between runs. Avoid anything that could startle, pinch, or trap. And always supervise. If your hamster shows hesitation, simplify the layout, reduce noise, and remove moving features.
Modularity is your superpower. With five to eight 16×16 modules you can create dozens of configurations—spirals, hub-and-spoke, figure-eight loops—without rebuilding from scratch. Color-code modules by role: green = safe chamber, blue = corridor, yellow = obstacle, red = “reset”/exit. A simple sticker or tile on each module’s edge tells you how it connects (N/E/S/W), so you can reshuffle in minutes.
Finally, plan for cleanup and longevity. Use sub-assemblies that lift out as one piece; avoid embedding treats directly into studs where crumbs lodge. Wipe with a pet-safe cleaner and let everything dry fully before the next session. If you prefer to keep this purely as a display MOC, you can run marbles as “test hamsters” to preview the route and timing. Whether you’re building for supervised enrichment or for show, a well-planned LEGO maze is equal parts creativity, engineering, and kindness to a very small explorer.
Tips for building and using a LEGO hamster maze
-
Supervision only. These are short, guided sessions—never leave a hamster alone in a LEGO build.
-
Smooth floors. Tile corridors; add occasional plates/grilles for traction on ramps.
-
Safe geometry. Corridor width: 6–8 studs; railing at least 2 bricks high for bridges; no sheer drops.
-
Gentle obstacles. Teeter ramps, swing gates, slider walls, bead-roller “logs”—all slow, non-snappy, and finger-tested first.
-
Low noise, low wobble. Reinforce bases with plates/Technic bricks; damp vibration with rubber feet under baseplates.
-
Clear sightlines. Use windows/panels for visibility; avoid dark tunnels longer than ~16 studs.
-
Treats as cues. A sunflower seed at decision points encourages exploration—use sparingly.
-
Modular map. Build 16×16 “rooms” labeled N/E/S/W so you can remix layouts in seconds.
-
Hygiene. Remove soft elements after each run; wipe hard parts with pet-safe cleaner and dry thoroughly.
-
Plan B. If your hamster seems stressed, switch to a display-only run with marbles to test the layout.
Ideas for MOCs that use this maze/obstacle technique
-
“Hamster City” hub: Central plaza with four themed districts (garden, beach, cave, market) as swap-in modules.
-
Puzzle corridor series: Each 16×16 adds one gentle mechanic (teeter, slider, one-way flap, bead rollers) for progressive difficulty.
-
Figure-eight run: Two loops connected by a shallow overpass with guard rails and a see-through floor.
-
Seasonal themes: Winter (white tiles, ice “pond” made of trans-light blue), Desert (tan dunes), Forest (leaf canopies on 1×1 bars).
-
Treat-foraging maze: Hidden wells covered by hinged plates; hamster nudges lids to reveal a single seed.
-
“Escape room” display MOC: Levers, color-coded doors, and signage—great as a people-safe, marble-tested show model.
-
Technic add-ons (human-powered): Hand-turned conveyor walkway or rotating cylinder made from stacked round bricks—always slow and supervised.
-
Training lane: Straight corridor with spaced archways to build confidence before introducing branches.
LEGO mazes for small pets are a wonderful blend of creativity and care: they challenge us to design thoughtfully, prototype rapidly, and put animal welfare first. Start simple, build modular, and iterate—soon you’ll have a library of safe “rooms” and obstacles you can re-arrange for fresh adventures in minutes. If you try this at home, share your favorite module ideas and layouts so other builders can learn from your designs—and if you’re keeping it strictly as a display MOC, show us your most beautiful themed maze! Happy building.
Disclaimer: This article was created with the assistance of AI. While efforts have been made to ensure accuracy and originality, the content may include automatically generated text and should be considered as informational only.

