Brick-Built Superheroes: What We Can Learn from “LEGO Deadpool by Bricker Builds”
Share
Turning cinematic icons into brick-built sculptures—techniques, tips, and MOC ideas you can try today
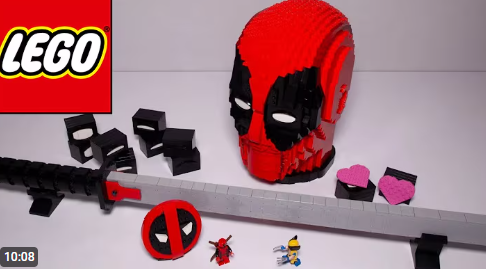
The linked video showcases a striking fan-favorite character—Deadpool—rendered as a large brick-built display model by Bricker Builds, with a fun cameo from Wolverine. It’s a perfect case study in character sculpting: bold color blocking, clean contours, and enough detail to read instantly from across the room. Even if you don’t plan to build this exact model, there’s a lot to learn here about shaping, SNOT (studs-not-on-top) construction, layer stacking, and how to balance stability with style in a display-grade sculpture.
At its core, character sculpting with LEGO is about turning pixels into voxels—translating 2D references (posters, screenshots, comic panels) into 3D mass. Bricker-style display builds often mix plate layering for smooth gradients with SNOT bricks to rotate studs and capture sharp edges (mask lines, eye shapes, armor seams). Look closely at any successful superhero bust or torso and you’ll notice a rhythm: broad “canvas” areas made from stacked plates (for color fields like red, black, or yellow) punctuated by SNOT-built accents (logos, eye outlines, belt details) that pop with contrast. Internally, these sculptures rely on hidden scaffolding—simple Technic spines or brick columns—that let you cantilever small sections safely while you chase curves. That inner skeleton is what makes the outer shell feel effortless.
Color discipline is equally important. Deadpool is a gift to builders because his palette is highly constrained: rich reds, deep blacks, and small metallic or gray notes for weapons or highlights. With such a narrow palette, your model reads cleanly even at low resolution. Wolverine (the cameo) is the same story—iconic yellows and blues with black accents—so tiny deviations in proportion or color placement are quickly forgiven by the brain, because the character’s identity is so strong. This is the magic of display sculptures: recognizability beats microscopic accuracy. Get the silhouette right, land the eyes and mouth/visor, and control the color blocking—everything else is refinement.
Finally, scale is your friend. Going a bit larger (30–60 cm tall) makes curves smoother, logos crisp, and attachment points stronger. It also lets you hide connection transitions more cleanly behind color breaks (mask edges, shoulder seams, or strap lines). If you’re tooling up to try your own, the video is a great reminder that confident, readable shapes and solid internal connections matter more than exotic parts.
Tips: How to Use These Techniques in Your Own Builds
-
Start with a silhouette block-out
In Studio (stud.io), rough in the bust with simple bricks/plates. Nail the outline (mask, jaw, shoulder slope) before adding details. If the silhouette feels right, the sculpture will read from distance. -
Build a light internal spine
Use Technic bricks or 2×X bricks to create a central backbone. Tie outer shells back to this spine every 6–10 studs so plates don’t bow. Keep the spine simple and strong—no fancy geometry needed. -
Use SNOT to “draw” facial features
Eye shapes, emblems, and mask seams shine when you rotate studs forward. Mix 1×1–1×4 SNOT bricks/plates, brackets, and tiles to outline crisp, high-contrast features. -
Color-block first, shade later
Lay down the hero colors in big fields. Once the model reads clearly, sprinkle in subtle texture (grilles, cheese slopes) to suggest fabric folds or seams without making it busy. -
Hide seams at natural boundaries
Join modules where the eye expects breaks—mask lines, shoulder straps, belt edges. This makes your model easier to transport and upgrade without visible scars. -
Test gravity early
Display sculptures live on shelves, not in CAD. Dry-fit critical sections (chin, shoulders, accessories) and do a gentle shake test. Reinforce before you detail. -
Parts planning = cheaper builds
In Studio, color-swap rare parts to more common hues that are visually identical once buried inside. Export a parts list and check BrickLink availability before you lock the design.
MOC Ideas You Can Build with the Same Approach
-
Superhero Busts & Helmets: Deadpool, Wolverine, Spider-Man, Iron Man, Black Panther—clean palettes and iconic silhouettes make them perfect for plate-and-SNOT sculpting.
-
Game & Anime Icons: Stylized heads (think chibi), masks, or props (swords, shields) that rely on bold color blocking.
-
Movie Props at 1:1 Scale: Bracers, gauntlets, handheld gadgets, or a katana hilt stand—sculpted shells over a Technic core.
-
Creature Statues: Dragons or Pokémon-style figures using layered plates for smooth curves, with SNOT tiles for eyes, claws, and pattern edges.
-
Display Dioramas: Torso-up busts mounted on themed plinths (logo tiles, comic-panel backdrop) for gallery-style presentation.
-
Mini-Bust Series: Keep proportions consistent and swap colors/emblems to build a team lineup for a shelf.
Whether you’re recreating the exact Bricker Builds Deadpool or riffing on the technique for your own heroes, the lesson is consistent: prioritize silhouette, structure, and color discipline. Lock the shape, reinforce the core, then layer in SNOT details that “read” from across the room. With a free tool like Studio, careful parts planning, and a focus on clean color fields, you’ll be surprised how quickly your sculptures start looking professional. Pick an iconic character, keep the palette tight, and build big and bold—your shelf will thank you.
Disclaimer: This article was created with the assistance of AI. While efforts have been made to ensure accuracy and originality, the content may include automatically generated text and should be considered as informational only.

