Starting Out with LEGO Technic? Your First Smart Steps
Share
Key beginner takeaways, hands-on tips, and MOC ideas.
LEGO Technic can feel like stepping into a new language: beams instead of bricks, pins instead of studs, axles instead of bars, gears instead of tiles. That’s exactly why a concise, well-paced primer is gold when you’re just getting started. The video “Starting out with Lego Technic? Watch this video!” from the Lucas-Dynamics channel is a fast nudge in the right direction: it orients you to the parts that matter and—more importantly—how they want to be combined so your builds don’t wobble, grind, or fall apart mid-test. If you’re coming from System building (studs-on-top), Technic’s biggest mindset shift is structural: you’re designing skeletons before skins—rigid frames, square geometry, braced corners, and stress-free motion paths come first; cosmetic panels come last.
At a high level, think in modules. Begin with a frame (rectangles become rock-solid when triangulated), then add motion (axles, bushings, gears, linkages), then control (manual levers or motorized hubs), and only then bodywork. Beginners often struggle when a rotating axle is held by too few supports, when friction pins are used where rotation should be free, or when gear trains mix sizes without understanding ratio and mesh. Start by over-supporting shafts (two bearings are minimum; three is better across spans), keep frictionless pins for things that must spin, and brace your gear pairs on both sides to prevent gear “peel-away” under torque. These are the tiny habits that separate a clattery prototype from a smooth, sturdy mechanism. The Lucas-Dynamics video is loved precisely because it points newcomers to these fundamentals and encourages experimenting in small, repeatable chunks rather than jumping straight to a full supercar.
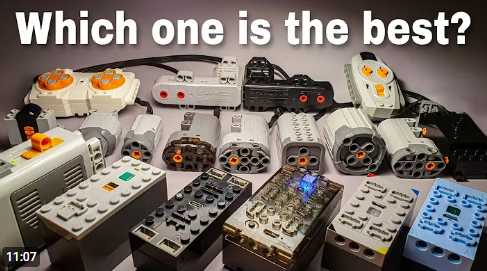
Once the skeleton makes sense, power and control become the fun part. Whether you use official Powered Up / Control+ hubs, third-party compact bricks like BuWizz, or purely manual mechanisms, the principle is identical: route torque through well-supported gear trains and give every moving element a clean path. If you’re brand-new, build a tiny test rig—one motor, one gear stack, one output—so you can see (and hear) how changes in gear ratio affect speed, torque, noise, and efficiency before you integrate it into a larger model. The key is feedback: quick builds, quick tests, and quick learnings. The video’s “start simple, iterate fast” vibe is the ideal way to make Technic click for good.
Practical tips: how to use these fundamentals
-
Frame first, features second. Build a rigid rectangle with perpendicular connectors and triangulate at least two corners. Add modules onto this instead of trying to brace after the fact.
-
Two-bearing rule. Any axle that transmits power should be supported in at least two places; long spans often need three to prevent flex.
-
Use the right pins. Blue (friction) pins for fixed joints, black frictionless or axle-pin combos where rotation is required.
-
Brace your gears. Wherever two gears mesh under load, capture both axles on both sides (a “box” around the pair) to stop skipping.
-
Mind the ratios. Start with 1:1; then try 12:20, 8:24, or worm gear drives to feel torque vs. speed before committing to a layout.
-
Keep slack out. Add bushings right up against gears and wheels so components can’t drift along the axle.
-
Cable and hub hygiene. If you motorize, route wires early. Reserve sheltered volume for the hub/battery and design access for charging and pairing.
-
Prototype tiny. Build a steering module, a suspension arm, or a mini-winch in isolation. When it works perfectly alone, drop it into a larger chassis.
-
Symmetry = sanity. Mirror left/right and front/back subassemblies to save time and reduce errors.
-
Document your wins. Snap photos of subassemblies; future-you will thank you when you rebuild or share instructions.
MOC ideas that put beginner Technic to work
-
Mini Go-Kart (Manual): Simple rear-axle drive with a 1:1 or 12:20 pair, working steering using a small rack, and a lightweight frame.
-
Compact Winch & Crane Arm: Teach yourself gearing and bracing; try a worm gear for self-locking and a small 4-bar linkage for the boom.
-
Tracked Micro-Dozer: Two identical motor modules (or hand-cranks) driving sprockets; perfect for practicing mirrored assemblies.
-
Desk-Toy Automata: Cam + follower mechanisms that animate a figure or scene—great for learning controlled rotation, bushings, and timing.
-
Suspension Test Mule: A narrow frame with independent wishbones or a live axle; experiment with leverage, ride height, and wheel travel.
-
Steering Module Library: Build several steering boxes (rack-and-pinion, linkage, H-drives) and keep them as reusable modules.
-
Gearbox Sampler: Not a full transmission—just a plate with common ratios and a selector to see how each feels under load.
-
Powered Up Demo Chassis: A flat frame that carries a hub and two motors; test mixing ratios (fast vs. torquey) on each side and compare behavior.
Ready to turn parts into motion? Pick one idea above, build it small, and iterate until it’s silent, smooth, and strong—then scale up. As you go, keep that beginner checklist nearby: brace, support, align, test. Before long, you’ll feel the Technic “click,” and your MOCs will start to look—and work—like the ones that first inspired you. Happy building!
Disclaimer: This article was created with the assistance of AI. While efforts have been made to ensure accuracy and originality, the content may include automatically generated text and should be considered as informational only.