LEGO Vacuum Engine Tutorial – Turn Suction Into Speed
Share
How to Build a High-Performance LVE (Lego Vacuum Engine) and What You Can Create With It
Every once in a while a Technic idea pops up that feels like pure magic the first time you see it. A LEGO vacuum engine—often called an LVE—does exactly that: you connect a household vacuum (or a shop vac) to a compact brick-built “engine,” flip the switch, and suddenly a piston starts hammering up and down, a flywheel whirs, and the whole thing sounds alive. The video “LEGO Vacuum Engine Tutorial – HIGH PERFORMANCE” walks through building a fast, powerful single-cylinder version that’s become a favorite gateway into this sub-hobby of kinetic LEGO engineering. It’s a step-by-step build aimed at performance—clean airflow, low friction, stable bearings, and dialed-in timing—so your engine actually revs, not just coughs.
At a high level, vacuum engines exploit pressure difference. When the valve opens, the vacuum source lowers the pressure in the cylinder; atmospheric pressure then pushes the piston upward. When the valve closes (and/or opens to atmosphere), air flows back in and the piston returns. Repeat that cycle quickly enough and the crankshaft spins—exactly like a tiny atmospheric “steam” engine, except your vacuum cleaner is the power plant. LEGO pneumatics enthusiasts have played with this idea for years, repurposing Technic beams, axles, bushings, and brick-built pistons to create real rotary motion from air flow. While LEGO Pneumatics weren’t originally optimized as engines, the community has developed clever valves, timing linkages, and lubrication tricks to make them fast and reliable.
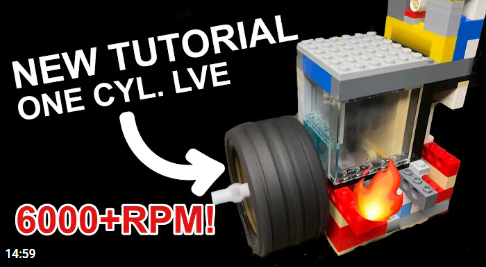
The tutorial featured here focuses on a compact, high-RPM layout (often dubbed “version 5” in the channel’s progression), and it emphasizes the little details that unlock performance—smooth journals, square frames, leak-free cylinders, and a positive-sealing valve. Paired with a steady vacuum source, these design choices can push thousands of RPM in a simple one-cylinder build—numbers consistent with what many builders report across the LVE community.
If you’re new to LVEs, don’t be intimidated. The parts list is ordinary: basic bricks and plates for the cylinder housing, Technic axles/connectors for the crank and valve, a tire or weighted wheel for the flywheel, and a few slopes/tiles to guide airflow. The magic lies in the valve timing—opening when the piston needs suction and closing to let air back in—and in keeping friction and leaks to an absolute minimum. Once you’ve got a single cylinder humming, you can expand the concept into multi-cylinder layouts, add camshafts and poppet valves, or even chain-drive a timing system—builders regularly experiment with SOHC/DOHC heads in LEGO to mimic real engines.
Below you’ll find practical tips to get your first engine running like the one in the tutorial, plus project ideas that turn this technique into full MOCs—from desk-toy demonstrators to wild multi-cylinder showpieces.
Tips to get great results
-
Air source and hose fit. Use a steady shop-vac or home vacuum with a controllable nozzle; ensure a snug, sealed connection to your intake so you aren’t losing suction before it reaches the cylinder. (Small leaks = big RPM loss.)
-
Minimize friction. Use fresh axles, true (undamaged) bushings, and ensure axles are perfectly coaxial through frames. Any rubbing in the crank, valve, or piston guide kills revs. The “basics” videos in this niche stress alignment as a top performance lever.
-
Valve timing matters. Set the valve phase so it’s fully open near the piston’s top-dead-center on the “suction” stroke and closed (or vented to atmosphere) on the return. If you add a cam/poppet-style head later, keep lift short, fast, and well-sealed.
-
Seal the cylinder. Tile interiors smooth, avoid gaps, and make the piston a snug sliding fit. A lightweight tire or stacked discs on the crank makes a good flywheel to smooth pulses.
-
Lubricate smartly. Many builders use a tiny drop of light, plastic-safe lubricant on axle journals and piston guides; too much collects dust. Dedicated LVE tutorials often show where to lube (and where not to).
-
Test in short bursts. Run for 10–20 seconds, check heat at friction points and hose connections, re-align if you feel vibration, then try again. Consistency beats long runs early on.
Ideas: what to build with this technique
-
Desk demonstrator (Single-cyl “rev monster”). Build the tutorial engine, add a transparent cylinder window, an RPM dial decal, and a sturdy base. Great for STEM demos and short reels.
-
SOHC/DOHC head experiments. Add a chain-driven cam and poppet valves to “breathe” more realistically; tune lift/duration and observe sound/RPM changes. (Community showcases of cam + poppet systems are a goldmine for inspiration.)
-
Inline-3/Inline-4 blocks. Gang multiple cylinders with offset crank throws for smoother rotation. Try cross-plane vs flat-plane experiments and add a shared plenum.
-
V-Twin or Boxer. Re-package two cylinders at 60–90° (V) or 180° (boxer) to explore balance and packaging. There are full tutorials and showcases out there to model from.
-
Dyno test rig. Build a simple brake (friction band or generator) to visualize torque vs RPM; swap flywheel masses and measure spool-up differences. (Advanced builders even log RPM on camera.)
-
Power a display. Use the engine to spin a sign, conveyor, or kinetic sculpture—great for exhibitions where constant motion draws eyes.
A LEGO vacuum engine is one of those projects that teaches engineering by feel: you’ll hear when the timing is right, see when alignment improves, and feel the difference when a tiny leak is fixed. Start with the high-performance single-cylinder tutorial to nail the fundamentals, then iterate—add a cam head, double the cylinders, or build a dyno to test your tweaks. When LEGO, air, and clever mechanics meet, you get a compact build that looks simple but rewards meticulous tuning—and that’s exactly what makes LVEs so addictive.
Disclaimer: This article was created with the assistance of AI. While efforts have been made to ensure accuracy and originality, the content may include automatically generated text and should be considered as informational only.

