
LEGO Keyboard MOCs: From Retro Typewriters to RGB Gaming Rigs
A practical guide to designing a LEGO® keyboard (plus 3 great models to inspire your build)
Designing a convincing LEGO keyboard is one of those deceptively simple challenges that teaches a lot about scale, texture, and tile work. At first glance it’s “just a rectangle with buttons,” but the moment you start laying out rows, staggering key widths, and capturing that gentle ergonomic slope, you’ll discover a rich little design problem. The good news? With smart SNOT (studs-not-on-top) techniques, consistent tile spacing, and a few optical tricks, you can build everything from a tiny desk accessory to a full 1:1 replica that looks right at home beside your real computer. This guide walks through build tips and creative ideas—whether you’re aiming for a compact LEGO keyboard kit feel, a displayable LEGO keyboard set for a diorama, or a flashy LEGO keyboard gaming scene with “RGB lighting.”
Start by choosing your scale. For micro builds (minifig desk scenes, book nooks, or a tiny office vignette), a single 2×6 or 4×8 plate topped with 1×1 tiles can suggest an entire keyboard. Slight offsets (leaving a stud gap every few tiles) suggest the staggered layout without placing 60+ keys. For mid-scale desktops, use 2×2 tiles as primary keycaps, 1×2 tiles for narrow keys, and 1×3/1×4 tiles for spacebar/Enter/Shift. A clean tile border around the keys doubles as a slim “keyboard case,” perfect for a minimalist or laptop look. At full scale, treat each key as a mini-brick: combine 1×1 and 1×2 plates to get correct key widths, then top with tiles. A mix of light bluish gray for caps and black for the case instantly reads “keyboard,” while accent keys (ESC, WASD) can pop in red or lime for that gaming vibe.
Angles and ergonomics matter. Use a bracketed subframe: hinge the key field a few degrees, then lock the angle with hinge plates or click hinges to mimic a real keyboard’s rake. Along the back, invert slopes under the top edge for that subtle lift. On the front lip, low-profile curved slopes (e.g., 1×2 or 1×3) soften the silhouette.
Legends & styling: You don’t need printed letters on every key to sell the illusion. Focus on landmarks: spacebar, Enter, ESC, and arrow keys. A single 1×2 grille tile can suggest an arrow cluster; a 2×2 tile with one corner marked (e.g., a 1×1 round tile) can read as ESC. Want a LEGO emoji keyboard? Swap a few caps with colorful 1×1 round tiles/plates to “print” emoji via color. For a LEGO Batman keyboard, integrate yellow highlights, a tiny bat emblem tile, or a black-and-yellow novelty spacebar. For LEGO keyboard gaming builds, create “RGB” by tucking light bricks or using trans-clear plates over colored plates so light diffuses under the keys.
Case craft: Build a rigid perimeter first. Layer plates for stiffness, then overlay tiles. If you’re going laptop-style, taper the sides with cheese slopes and use SNOT bricks for the palm rest to get a silky tile finish. A tile-on-bracket trick lets you inset a trackpad cleanly. For detachable LEGO keyboard case designs (e.g., a separate hot-swappable plate of keys), pin the key field with Technic pins/axles so you can lift it out and tweak layouts.
Tips: How to Build a LEGO Keyboard (MOC)
-
Plan the rows: Sketch (or Studio-mock) a 15u layout (ANSI/ISO). Use 1×2 tiles as “1u” units at mid-scale; compose larger keys (Shift/Enter/Backspace) from 1×3/1×4 tiles.
-
Lock the angle: Build your keybed on a subplate connected with hinge plates; add wedges under the rear edge for a stable tilt.
-
Make it rigid: Sandwich a plate layer under the keybed and add SNOT bricks along the edges to accept a tiled case.
-
Landmark keys: Give ESC, spacebar, Enter, and arrows distinctive shapes or colors—readability beats literal lettering.
-
Fake “RGB”: Place colored plates under a lattice of trans-clear plates/tiles, or seat a small light brick behind a trans strip along the back.
-
Cable or wireless: A short flex tube makes a convincing braided cable; a 1×1 round tile on the top edge makes a “Bluetooth LED.”
-
Finish with texture: Smooth tiles on top; a few studs exposed at corners add LEGO DNA without breaking the sleek look.
-
Keep parts handy: If you’re drafting a LEGO keyboard build for instructions, prep swappable rows in Studio so readers can choose ANSI vs. ISO or color accents.
Ideas: Models to Build With Your LEGO Keyboard
-
Compact TKL or 60% board: Great for deskscape MOCs, easy to scale, and perfect for color-accented WASD.
-
Retro terminal or typewriter: Dark tan/black with round keys (1×1 round tiles) for vintage charm.
-
Laptop scene: Pair with a brick-built trackpad, hinge-up screen, and a tiny USB-C cable.
-
Streaming/gaming rig: Full-size board with trans tiles for RGB, a LEGO keyboard case stand, and a brick camera/microphone boom.
-
Themed boards: LEGO Batman keyboard (black/yellow highlights), LEGO emoji keyboard (colorful novelty keys), or franchise-inspired caps.
-
Music twist: Convert it into a MIDI keyboard—fewer, wider “piano” keys with black key sharps using 1×2 jumpers.
LEGO Keyboard Videos for Inspiration
Sometimes seeing a build in action is the best way to spark new ideas. Alongside written guides and instructions, many builders share their LEGO keyboard creations through video demonstrations. These videos are especially helpful because you can watch how the keys are arranged, how builders solve spacing challenges, and even how some make their keyboards functional with electronics.
Model Gallery & Instructions
MacBook Pro w/ Retina Display Replica
Designer: CherryRose
Get the instructions: Model: MacBook Pro w/ Retina Display Replica — Designer: CherryRose.
keyboard
Designer: Duesenjaeger91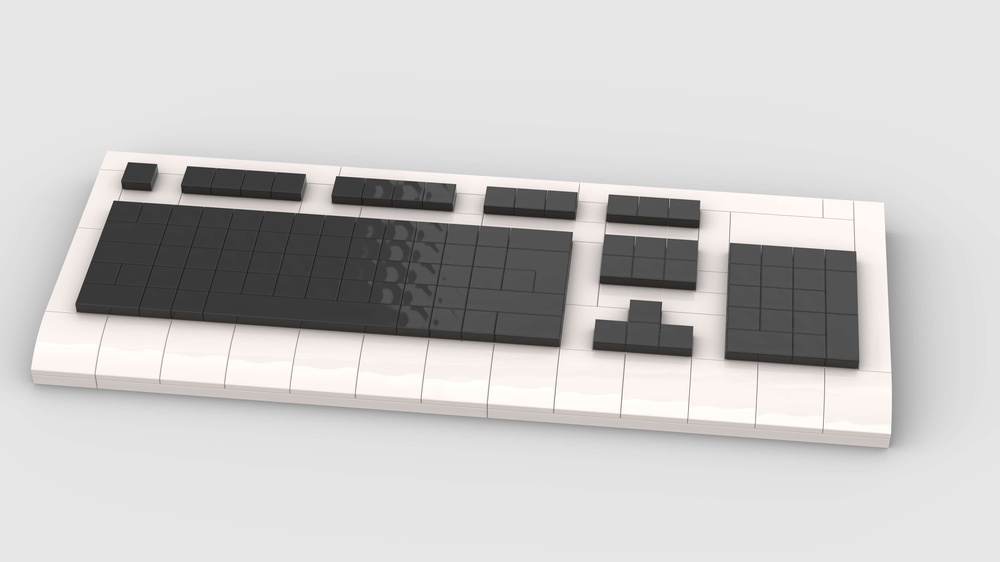
Get the instructions: Model: keyboard — Designer: Duesenjaeger91.
The Computer
Designer: fartemyi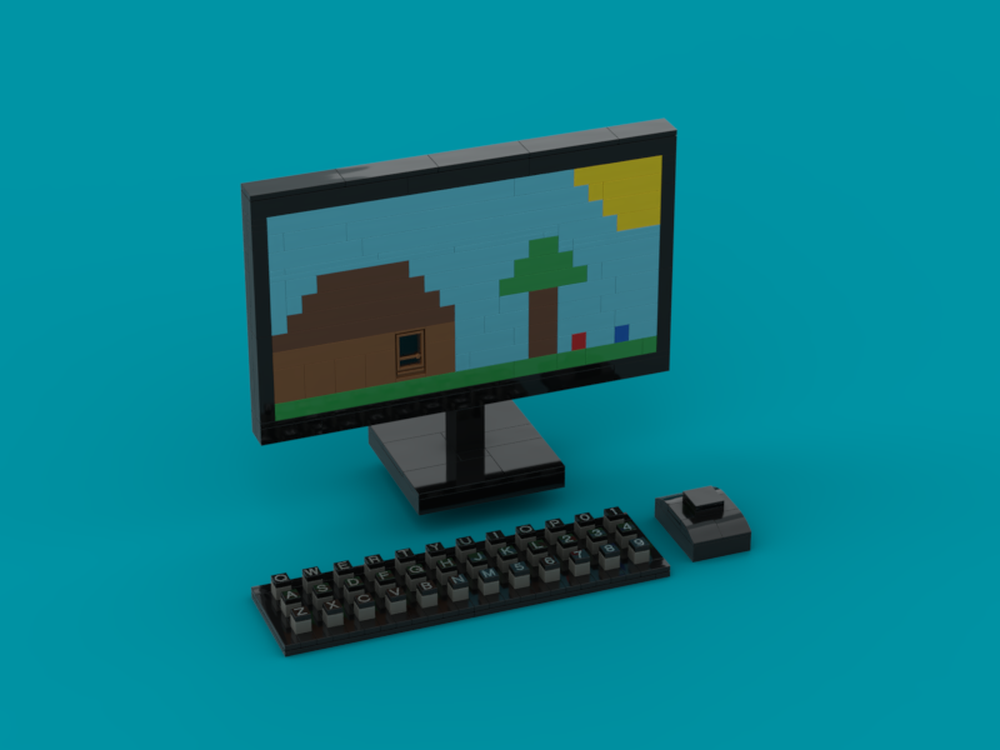
Get the instructions: Model: The Computer — Designer: fartemyi.

